[PR]上記の広告は3ヶ月以上新規記事投稿のないブログに表示されています。新しい記事を書く事で広告が消えます。
Reblogged from:https://y2mate.work/user-manual#P2
The media consumption and the way we have been consuming music and videos have changed to a considerable extent over the past few years. The growth of streaming services has been instrumental in changing the way we have been consuming media. However, this should not mean we do not need the video downloaders anymore.
Table of Contents:
6. Download Supported Websites
7. Download DRM protected streaming content
The ability to play downloaded media files even when you are offline and an option to get access to download resolutions such as 4K and 8K are what would further enhance your experience. Y2Mate Video Downloader is one such excellent service that has redefined your experience by several counts. The DRM Video downloader capability, YouTube to MP3 functionality, and other additional benefits can be what makes it one of the prime options.

Features offered by Y2Mate Video Downloader
Support for as many as 1000+ websites, see supported websites by y2mate.
Download options for several DRM-protected services such as Amazon, HBO Max, Netflix, and Hulu to name just a few.
A wider range of resolution options that include right from 144p to 8K
The ability for up to 5 download tasks
Turbo speed options for music and video offering 10X faster downloads.
Options for audio resolutions of 320Kbps and 128 Kbps.
An easier option for organizing your videos and shows.
You can download the Y2Mate Downloader from the official product page at Y2mate Official Website. You can download online of the offline installer as per your convenience. The online installer is a simple and small sized installer that would need you to connect to the internet every time. If you are installing the software on any other device with the online installer, you will need to connect to the internet.

The offline downloader on the other hand downloads the standalone installer which does not need you to download any further components when you want to download the software again.
Step 1 – Download the Online Installer from the product page
Step 2 – Click o the icon to begin the installation
Step 3 – Wait till the installation is done in a few seconds. The online Installer will begin downloading the components and install them.
Step 4 – Launch Y2Mate Downloader
Step 1 – Download Offline installer from the Product page
Step 2 – Double click the installation file to begin the installation
Step 3 – Wait till the installation is complete.
Y2Mate Downloader requires you to authorize your credentials and needs you to authorize your account through online verification. If you find your Antivirus solution or Firewall affecting the authorization, whitelist the application to prevent authorization errors.
On starting Y2Mate Downloader, look for the Menu option through the hamburger icon, and click on Authorise.

Enter your Y2Mate User ID and password and click on Login

You can create your Y2Mate ID from here if you do not have one already.
You will find the information that your device is authorized if you have entered the right credentials.
You can even your license information once you have subscribed.
You can even unsubscribe by going into settings and then clicking on Deauthorise.
There are different ways you can update the software for Y2Mate Downloader. You can either use the live update or choose to manually download the update. The latest version of the software will always be available on the Product page and you can use the option for downloading it through online or offline mode as explained in the previous steps. The existing software version will be upgraded to the latest version.
The Live Update feature does not need you to download the entire package each time there is an update available.
Whenever a new update is available, the downloader will alert you with a pop-up indicating the availability of an update. You can use the Live Update feature instantly.
1. Manual Update
You can simply visit the product download page and download the latest version of the software. You can choose to download the online or offline downloader based on your preference. Once the program is downloaded, click on the file to install it.
2. Live Update
Live Update can be achieved from within the software. You can check for updates through the Settings menu and you will be upgraded to the latest version of any new version is available. The Live Update feature also comes up automatically whenever there is a new version available.

You can check out and configure the settings based on how you would want to use the software. The Settings Menu is divided into several subset of menus and lets you download your video with a much comfortable manner.
1. General
The General Settings let you choose the language, Audio, and video directory, and the default quality levels for audio and video downloads. It can also provide you an insight and configuration of the software behaviour.

2. Streaming service Settings
The settings here will let you configure the region, codec and other details for the streaming services supported on the platform.

The Network settings let you configure the network settings for Y2Mate Downloader.

4. Auto Download
The Y2Mate Downloader supports downloading the content from your subscribed channels and service automatically. When you download a show or an episode of a series – the software detects that it is a part of the series and looks for the episodes of the series. When it comes across new episodes of the series, they are automatically downloaded onto your device. The best part is that the service works in the background.
5. Batch Download
The Batch Download options available through the settings is yet another best feature you would find simple and easy to go with. The Y2Mate Video Downloader lets you download up to five videos simultaneously. The Batch download feature can be accessed through the main menu settings.
Y2Mate Downloader lets you download videos in a very professional manner from several sites. The ability to download the content from the DRM protected sites and services makes it a formidable choice for downloading
The Y2Mate Downloader can be used for downloading the content from non-paid and non DRM online music and video services. You can easily download videos and other content from over 1000 different streaming and video sharing services. The downloaded files can either be saved in the MP4 or MP3 format based on your individual preferences. You can download the content in multiple formats right from 144p to 8K.
You can simply copy the video URL from the service and paste it into the Y2Mate Downloader. The software will analyze the link and provide you the download options in different resolutions. You can pick the quality of the video and format based on your preferences.

It can also be a great option to use the built-in browser for getting access to the best download options. You can visit the relevant video sharing site from within the built-in browser. The browser does provide you access to a host of most used websites directly on the homepage. The websites are listed in an alphabetical order.

The Y2Mate Downloader does offer you an option to download streaming TV shows and other content from a host of major streaming services such as HBO Max and Amazon Prime Video. You can simply get access to the respective service on the Y2mate Downloader interface and sign in to it. Once that done, you can begin downloading your video as you watch it.

The Y2Mate Downloader also offers you access to a turbo download feature wherein you can download the video at a faster pace.
The supported websites include – HBO MAX, Amazon Prime, Disney+
To be released soon - Netflix, Hulu
Hot Websites - YouTube, Vimeo, Facebook, Twitch, Dailymotion, Metacafe.
Want to know more about the sites supported on Y2Mate Downloader? You can check out the A to Z list here.
Y2Mate Downloader provides you access to check your downloaded videos under the Task Queue. If you are downloading music, all your downloaded music is categorized under the Music tab, while the videos are categorized under the Video tab.

1. Manage Music
Your Music files are managed under the Music tab and let you play all the music files in the order of preference. You can use any decent Media Player to play the music files with ease and simplicity. You can change the small icon on the interface to change the music order as per your preference.
2. Manage Videos
Managing the videos should rather be easier when compared to managing music. There is an option to check the video URL and check the source page comfortably. You can use the Play All button to sort out all your videos.
Y2Mate Downloader reserves the right to alter the contents of this user manual without any prior notice to the users and customers. The User Manual may be updated as per the needs that may arise on account of the changes made to the software in the future.
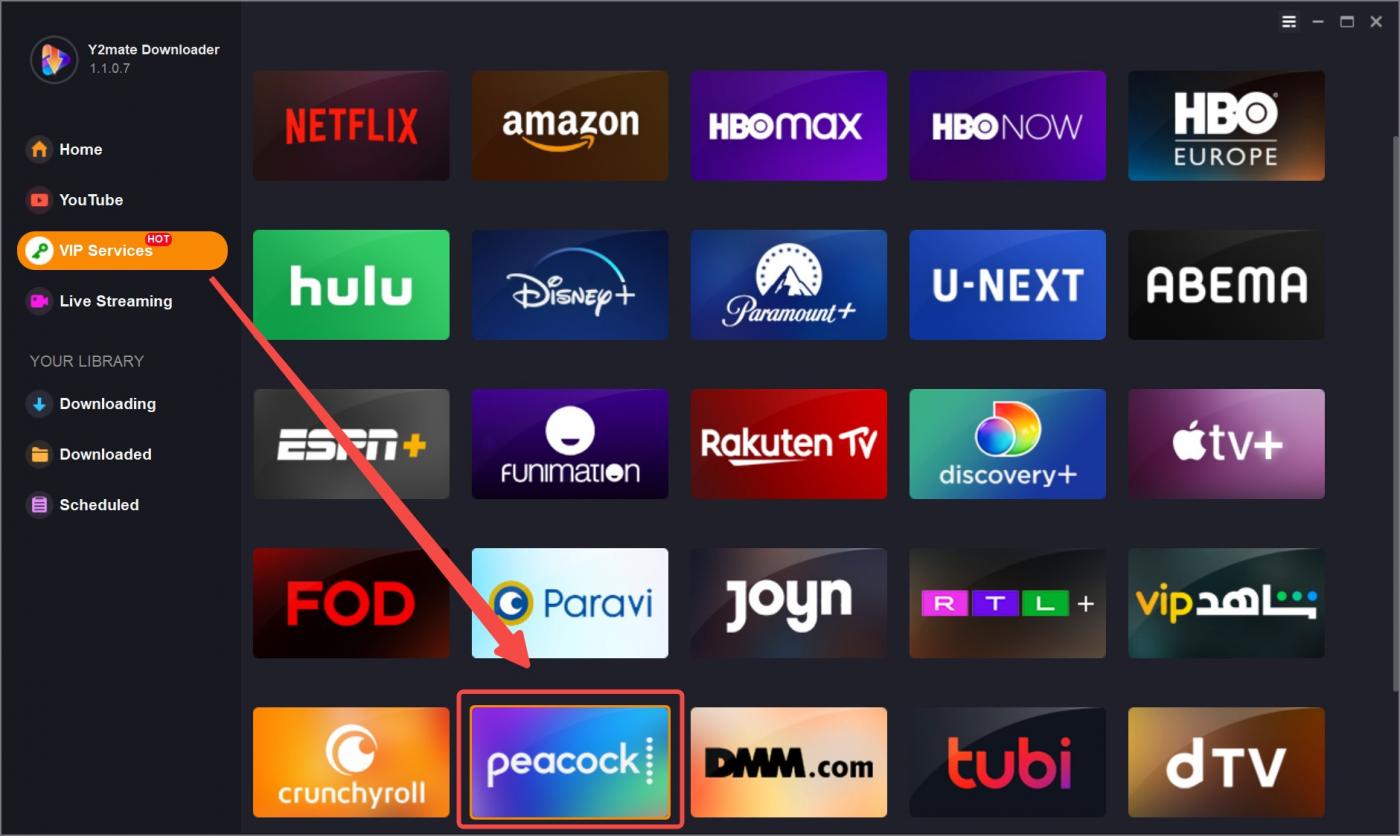
Reblogged from:https://sothinkmedia.com/how-to-download-peacock-tv-shows
Looking for other download solutions?
Please Check: [Ultimate Guide] How to Download Videos & Music from ALL OTT Platforms
Practically, you can download the movies and TV shows you see on any streaming service: Netflix, Prime Video, HBO Max, Discovery+, Disney Plus, Paramount TV, and the list keeps going. This article is about Peacock TV, one of the best streaming services to find top-notch originals - but it is limited to certain regions.
Just as with other streaming services, to download Peacock TV video or TV show, you need a Peacock Downloader software program. There are quite many of them out there, but below, we have listed the best-recommended option you should try out. However, before we proceed further, here is an overview of the Peacock streaming service.
Founded recently, in April 2020, Peacock TV is an American Over-The-Top (OTT) video streaming service with lots of interesting content to offer its subscribers. The service offers a completely free version and then a few premium plans with added benefits.
Peacock TV streaming is owned and operated by the Television and Streaming division of NBCUniversal, a subsidiary of Comcast. To access the Peacock TV streaming service, you must be located within the US. If you’re outside the US, you may need a VPN.
For subscribers streaming on the mobile app, you can save certain titles and shows for “Offline Viewing.” Since it is not all Peacock TV shows can be downloaded in this manner, a “Download” icon/button is attached to any video supported for offline download.
Also, you need to be on the Premium Plus plan before you can download shows for offline streaming. The downloaded videos would expire after some days, and if you start watching a downloaded video, you have until 48 hours to complete watching the video or it’d expire.
To bypass the several limitations of downloading Peacock TV shows via the mobile app, Peacock TV downloaders are available for Windows OS and macOS PC users.
With any of these downloaders, you can grab any movie or show from Peacock TV, and the movies can be saved in different formats.
Y2Mate Peacock Downloader is a professional software program for downloading Peacock TV shows. It allows you to download any kind of video from the streaming platform and have the video saved in MP4 format, with stunning HD clarity - 1080p. This downloader supports AAC audio tracks.
With Batch Mode support, you can download multiple movies at the same time. There’s no limit to the number of videos you can download using this Peacock TV downloader. More so, Y2Mate Peacock Downloader removes ads from the downloaded movies and provides you with different options on how to deal with the subtitles.
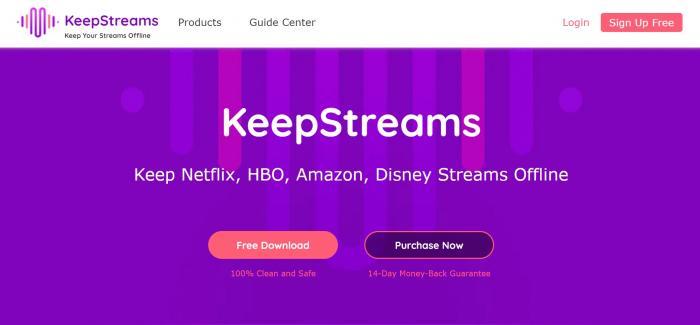
The KeepStreams downloader supports downloading content from a wide range of premium streaming services, which includes Peacock TV. This downloader is easy to use, allows you to download multiple episodes at the same time, and supports 1080p FHD quality, along with AAC audio.
KeepStreams provides you with a set of flexible parameters you can adjust to make your download stand out. With KeepStreams, you won’t watch Peacock TV shows with commercials showing in-between streams; this downloader would remove the ads so you can enjoy your movie swiftly.
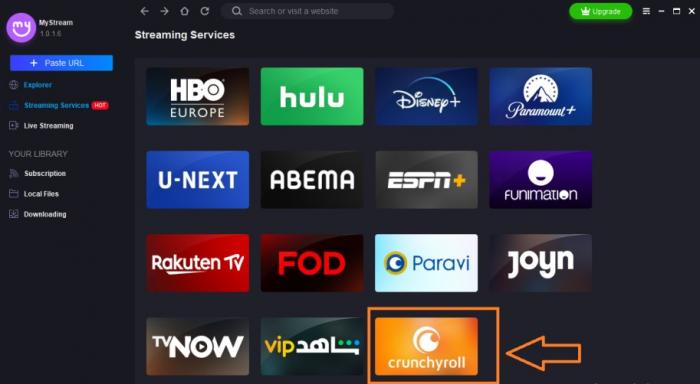
This is another impressive downloader that supports different streaming services. It is packed with a ton of useful features and flexible settings you can adjust to personalize how you download videos and shows from streaming services, including Peacock TV.
FLVTO MyStream flaunts an intuitive interface that anyone can easily understand, navigate, and use. It supports up to 4K resolution and MP4 format. More so, this Peacock TV downloader can download an entire episode at a go, and it is fast in processing downloads.
Here’s a downloader that lets you save any Peacock TV video in clear HD quality and 5.1 audio. StreamFab Peacock TV Downloader is one of the best options out there because it is very fast in downloading TV shows from the platform. The download videos would be saved in MP4 format, which is playable on any device.
The StreamFab Peacock TV Downloader program is available for macOS and Windows OS. It removes ads from Peacock TV videos (just like the others) and preserves the metadata information for easy management on media servers and local libraries.
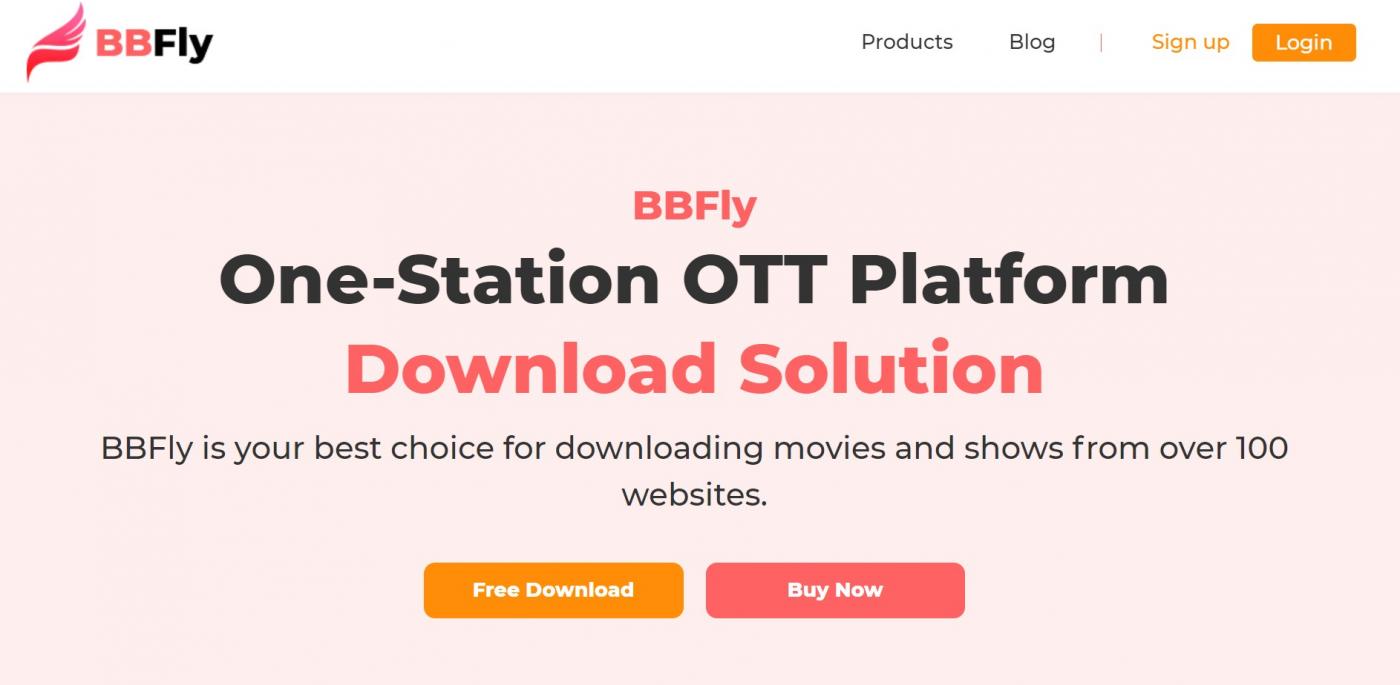
BBFly is also a streaming video downloader that supports grabbing videos from quite several streaming websites. For Peacock TV movies, this downloader lets you save them in MP4 format, 1080p FHD quality, and high-quality audio. The interface is this program is simple to understand.
With BBFly Downloader, you'd enjoy features like batch download, metadata information preservation, and gain access to many other sites. BBFly Downloader runs on Windows OS only. The premium plan is also not too expensive.
As the list continues, FlixPal is a modern video downloader program designed for Windows OS. In practicality, there is no difference between this downloader - FlixPal - and the other ones mentioned above. FlixPal is a video downloader that can capture any movie, episode, or TV show found on the Peacock TV platform.
Furthermore, FlixPal removes ads from videos and makes them playable on any device you’ve got. If you’re a subscriber of multiple streaming services, FlixPal can be a great tool for you because it supports several streaming services.
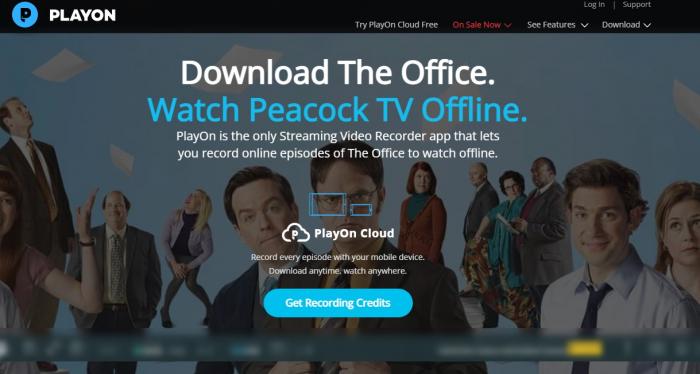 How about PlayOn Cloud? That’s another decent program for downloading Peacock TV shows. However, unlike the downloaders mentioned above, PlayOn Cloud records Peacock TV shows. You have to install the app on your phone, launch it, open Peacock TV, and play the movie you want to download.
PlayOn Cloud would record the movie as it plays - skipping the ads. The recorded video would be saved in MP4 format, on your device, so you can watch it offline without any limitations. You can consider this option, still.
Conclusively, you can save any video you find on Peacock TV, but that requires using 3rd-party programs called Peacock TV downloaders. These ones reviewed here are the best options to choose from.
Reblogged from:https://sorekosoft.jp/aviutl-mp4
「AviUtlでMP4形式のファイルが使えないんだけど、どうしたらいいんだろう......」
初心者から上級者までたくさんの愛用者がいるフリー動画ソフト『AviUtl』。
ですが、初期状態のままだとMP4形式のファイルを読み込んだり出力したりできないのはご存じでしたか?
そこで本記事では、AviUtlでMP4ファイルの読み込み・出力(エンコード)方法を解説します! MP4ファイルの読み込みに失敗する場合の対処法もあわせて紹介しますので、ファイルが読めなくて困っている人はぜひ本記事をお読みください。
AviUtlでMP4ファイルを読む込むには、プラグインの導入が必要です。
本記事では、人気の入力プラグイン『L-SMASH Works』を利用したMP4ファイルの読み込み方法を紹介します。
合わせて読む >> AviUtlの使い方を初心者向けに徹底解説
AviUtlのプラグインとは? おすすめのプラグインも紹介!
MP4ファイルをAviUtlに読む込むための準備として、『L-SMASH Works』というプラグインを導入します。こちらのプラグインを入れると、MP4やMOVなど主要な動画ファイルが扱えるようになります。
AviUtlへ『L-SMASH Works』プラグインを導入する手順は以下の通りです。

1. 初めてプラグインを導入する場合、AviUtl本体のフォルダに「Plugins」という名前のフォルダを作成する

2. 『L-SMASH Works』のダウンロードページ (https://pop.4-bit.jp/?page_id=7929) からzipファイルをダウンロードする

写真引用元:https://denno-sekai.com/
3. zipファイルを展開後、中身のファイルのうち「lwcolor.auc」「lwdumper.auf」「lwinput.aui」「lwmuxer.auf」の4つを「Plugins」フォルダ内に移動する

4. 以上のインストール作業が完了したら、AviUtlの編集画面上部にある「ファイル」を開く
5. 「環境設定」の中から「入力プラグインの優先度の設定」を選ぶ
6. 「L-SMASH Works File Reader」を選択した状態で「上に移動」ボタンを押し、優先度をできる限り上げる
7. 調整が終わったら「OK」ボタンを押して終了する
・L-SMASH Works r940 release1 / mod1(ダウンロードページ)
https://pop.4-bit.jp/?page_id=7929
「Plugins」フォルダがなくてもダウンロード可能ですが、ファイルの管理しやすさを考えると作っておくのがおすすめです。
『L-SMASH Works』の導入では、すべてのファイルをAviUtlに移すわけではありません。必要なファイルは4つのみですので、間違えないように注意しましょう。

ダウンロードから初期設定まで完了したら、以下の手順で動画を読み込んでください。
1. 拡張編集のタイムライン画面を表示させる
2. タイムライン上にMP4ファイルをドラッグ&ドロップする
3. 設定ダイアログが表示された後、読み込みが完了する
『L-SMASH Works』を用いてMP4ファイルを読み込む場合、特殊な動作は必要ありません。インストールさえ完了していれば、ほかのファイル形式と同じく、ドラッグ&ドロップだけで簡単に動画を読み込めます。
プラグイン設定を変更すると、動画ファイルを自動で動画データと音声データに分けて読み込むことも可能です。
AviUtlで編集した動画をMP4形式で出力するには、以下の2つの方法があります。
それぞれのプラグインを用いた出力方法について解説します。
『かんたんMP4出力』プラグインを導入すると、MP4形式で動画ファイルを出力できるようになります。
ここでは、出力作業前の準備と出力時の使い方について解説します。

MP4ファイルを形式で出力する準備として、まず『かんたんMP4出力』プラグインを導入します。導入方法は以下の通りです。
1. ダウンロードページから『かんたんMP4出力』をダウンロードする
2. ダウンロード完了後、zipファイルを展開する
3. 展開済みのファイルのうち、「easymp4.auo」を「Plugins」フォルダ内に移動する
・Aviutl プラグイン 「かんたんMP4出力」 : プログ(ダウンロードページ)
https://aoytsk.blog.jp/aviutl/34586383.html

『かんたんMP4出力』プラグインが導入できたら、以下の手順で動画を出力できます。
1. AviUtl操作画面の「ファイル」を開く
2. 「プラグイン出力」のうち『かんたんMP4出力』を選び、「ビデオ圧縮」ボタンを押す

3. 画質や音質の設定画面が表示されるので好みに合わせて設定し「OK」を押す
4. ファイル名や保存場所を設定し、「保存」を押すと動画が出力される
出力時の設定画面で変更できるものは以下の通りです。
「ハードウェアエンコード」はGPUを利用する出力方法ですので、GPU未搭載のPCでチェックを入れるとエラーが起こります。
続いては、『x264guiEx』プラグインを用いたMP4形式での出力方法を解説します。
こちらを導入すると、MP4およびMK4形式で動画を出力できます。

出力プラグインである『x264guiEx』を導入するには、以下の作業を実施してください。
1. ダウンロードページ右側にある「x264guiEx 2.xx」というリンクをクリックする
2. 「x264guiEx 2.xx」をダウンロードする
3. 「auto_setup.exe」を実行するとx264guiExのインストールが開始される
4. ダウンロード先の設定画面が表示されるので、AviUtlが入っているフォルダーを指定する
5. インストール終了後、「インストールが完了しました」という表示が出ていれば「終了」ボタンを押す
6. 「インストールに失敗しました」と出ていればダウンロードからやり直す
・rigayaの日記兼メモ帳(ダウンロードページ)
https://rigaya34589.blog.fc2.com/blog-category-5.html
ファイル名については2021年10月29日時点での情報です。アップデートにより最新版がリリースされていれば、そちらをダウンロードしてください。
『L-SMASH Works』をはじめ、ほかのプラグインを導入するときはダウンロード後のファイルを「Plugins」フォルダに入れる操作が必要です。一方、『x264guiEx』ではインストーラーを用いてダウンロードするので、移動作業は必要ありません。

『x264guiEx』プラグインを導入した場合、以下の手順でMP4形式の動画ファイルを出力できます。
1. AviUtlの操作画面の「ファイル」を選ぶ
2. 「プラグイン出力」から「拡張 x264 出力(GUI)Ex」を選ぶ
3. 「ビデオ圧縮」ボタンを押して設定画面を表示する

写真引用元:https://vip-jikkyo.net/
4. 「プロファイル」から目的に合うプリセット設定を選ぶ
5. ファイル名を設定後、「保存」を押すと出力される
6. 『x264guiEx』の設定画面は『かんたんMP4出力』より複雑で、初心者だと「難しそう」と感じる人もいるでしょう。
しかし、「プロファイル」からあらかじめ用意されたプリセットを選ぶだけで設定が完了するので、実際はそれほど大変ではありません。以下は選択できるプリセットの一例です。
また、手動で設定を細かくいじることもできるので、複雑な設定を行いたい人にも向いています。
AviUtlでは、プラグインを導入したのにMP4ファイルを読み込めないというトラブルが起こることがあります。そんな時に備えて、ここからはAviUtlでMP4ファイルを読めないときの対処法を紹介します。
「今まさに読み込めなくて困っている」という人はぜひ対処法を実践にしてみてください。

とくにプラグインを導入直後であれば、AviUtlを再起動すると有効な場合があります。
AviUtlは起動時点で存在しているプラグインだけを認識する仕様です。そのため、すでにAviUtlを起動した状態でダウンロードやインストールを行うと、新たに追加したプラグインは読み込まれていない可能性があります。
プラグインの導入直後は必ず一度AviUtlを再起動するようにしましょう。
AviUtlを再起動してもプラグインが認識されていないなら、『L-SMASH Works』のダウンロード、インストール自体に失敗している可能性があります。プラグインを導入し直すことで、正常にMP4ファイルを取り扱えるようになるでしょう。
ダウンロード時にエラーが表示されていなかったか、また必要なファイルをすべて「Plugins」ファイル内に移動したかを念入りにチェックしてください。
プラグインは正常なのに動画ファイルが読み込めない場合、動画ファイル名や保管場所が原因かもしれません。これらを変更してみると解決する場合があります。
たとえば、動画名に英数字や日本語以外が使われているとエラーが起きやすいです。動画名にギリシャ文字や中国語などが含まれる場合、英数字だけのシンプルな名前に直してみてください。

『L-SMASH Works』の優先度を上げると、MP4ファイルを読み込める場合があります。
プラグインをAviUtlに複数導入すると、プラグイン同士が干渉しあって正常に動かなくなるケースも。こうしたときは、あらかじめ設定しておいた優先度が高い方を優先する仕様になっています。
動画ファイルを読み込むための『L-SMASH Works』の優先度が低いと、問題が起こったときに真っ先に使えなくなってしまいます。優先度をできるだけ高くしておけば、異常があっても正しく動作する確率が高まるのです。
プラグインの優先度は「環境設定」のうち、「入力プラグインの優先度の設定」にて変更できます。
最大画像サイズを超えるサイズの動画ファイルを読み込むと、エラーメッセージが表示されて読み込みに失敗します。その場合、システム設定から「最大画像サイズ」の設定を変更しましょう。

写真引用元:https://nonkina10-3.up.seesaa.net/
1. AviUtlの編集画面上部の「ファイル」から「環境設定」を開く
2. 「システムの設定」を選ぶと設定画面が表示される
3. 「最大画像サイズ」の幅と高さを読み込みたいファイルより大きい値に再設定する
4. 設定が完了したらAviUtlを再起動する
システム設定を変更しても、AviUtlを再起動するまで反映されません。設定を変更した後は毎回再起動するのを忘れないようにしましょう。
『L-SMASH Works』プラグインの設定のうち、「Libav+L-SMASH」のチェックを外すとMP4ファイルを読み込める可能性があります。

1. AviUtl編集画面上部の「ファイル」から「環境設定」を開く
2. 「入力プラグインの設定」のうち「L-SMASH Works File Readerの設定」を選ぶ
3. 表示された設定画面にて「Libav+L-SMASH」のチェックを確認する
4. チェックが入っていたらチェックを外し、「OK」ボタンで設定を終了する
「Libav+L-SMASH」は、読み込んだ動画ファイルを動画データと音声データに分けて開けるようになる機能です。非常に便利な機能ですが、有効にするとファイルを正常に読み込めない原因になることがあります。
本記事では、AviUtlでMP4ファイルを取り扱う方法について、以下の内容を中心に解説しました。
AviUtlは便利な動画編集用フリーソフトですが、初期状態のままだとMP4ファイルを扱う機能がそもそも付いていません。しかし、プラグインを導入すれば、MP4ファイルを読み込み・出力できるようになります。
MP4形式は動画において非常にメジャーなファイル形式です。動画編集ソフト上で扱えないとなると、毎回のように余計なファイル変換作業が発生してしまう可能性もあります。
本記事を参考にしてAviUtlでMP4ファイルを扱えるようにしておき、動画編集をスムーズに行える環境を作りましょう!
Reblogged from:https://de.flvto.guru/fix-disney-plus-error-code-76
Der Disney Plus-Fehlercode-76 zeigt an, dass Sie versuchen, Disney Plus mit einer langsamen Internetgeschwindigkeit zu sehen. Der OTT warnt Sie, dass ein Fehler aufgetreten ist, und weist Sie darauf hin, dass Sie Ihren Internetplan anpassen oder ändern sollten. Eine schlechte Internetverbindung macht das Streaming von Disney Plus unmöglich. Sie benötigen eine starke Internetverbindung und unterstützende Geräte, um Disney Plus-Programme streamen zu können.
Gehen wir der Sache auf den Grund!

Eine langsame oder unzureichende Internetverbindung beeinträchtigt die Möglichkeit, Videos anzusehen. Eine starke Internetverbindung ist unerlässlich, insbesondere beim Live-Streaming. Der Disney Plus-Fehlercode 76 zeigt an, dass Sie versuchen, ein Video über eine langsame Internetverbindung anzusehen. Aufgrund der geringen Signalstärke und Geschwindigkeit kann das Gerät keine Verbindung zum Server herstellen. Daher wird der Fehler 76 angezeigt.

Android
iOS
Smart TV
Media Streaming Player
Sie müssen diesen Fehlercode beheben, wenn Sie einen langsamen Internetzugang haben.
Prüfen Sie zunächst, ob Ihr Internetdienst Live-Streaming unterstützt. Wenn dies der Fall ist, wenden Sie andere Techniken an, um das Problem zu beheben.
Überprüfen Sie die Signalstärke Ihres Routers/Modems.
Verschieben Sie sie, um die Signalstärke zu verbessern.
Sie können Ihr Gerät neu starten und warten, bis die Sendung zu Ende ist.
Diese Lösungen sind für Sie erreichbar, also fangen Sie an.
Einige andere wichtige Fehlercodes in Disney Plus können Ihre Sehzeit ernsthaft beeinträchtigen. Dieser Artikel wird Ihnen helfen, die Fehlercodes und die Lösung zu identifizieren.
Wenn Sie versuchen, sich mit einer falschen Benutzerkennung oder einem falschen Passwort bei Disney Plus anzumelden, wird der Fehlercode 14 angezeigt. Disney Plus kann Ihnen den Zugriff auf Ihr Konto verweigern, wenn Sie sich das Passwort und die Kennung nicht merken können. Die Fehlermeldung 14 erscheint auf dem Bildschirm, weil Sie wiederholt versucht haben, sich anzumelden.
Dieser Fehler ist nicht auf ein bestimmtes Gerät bezogen. Er kann bei jedem Gerät auftreten, wenn das Passwort und die Benutzerkennung falsch sind.
Haben Sie Ihr Passwort und Ihre E-Mail-Adresse vergessen? Klicken Sie auf den Link Passwort vergessen.
Um Ihr Passwort wiederherzustellen, klicken Sie auf den unten stehenden Link.
Geben Sie Ihre E-Mail-ID ein und verifizieren Sie sie. Geben Sie dann das Passwort erneut ein und Sie können die Millionen von Disney Plus-Shows durchsuchen.
Der Disney Plus-Fehlercode 90 erscheint aufgrund von Gerätekompatibilität, Konnektivitätsproblemen oder kontobezogenen Problemen. Der Fehlercode 90 kann aus einer beliebigen Kombination dieser Gründe oder auch nur aus einem oder zwei Gründen auftreten. Diese drei Probleme können von Ihnen identifiziert und entsprechend behoben werden.

Android
Smart TV
Streaming Media Player
iOS
Wenn es Probleme mit dem Streaming gibt, können Sie die App neu installieren. Sie können die App von der offiziellen Website Ihres Geräts herunterladen. Kompatibilitätsprüfungen sind erforderlich, wenn Ihr Gerät nicht mit Disney Plus kompatibel ist.

Ein Fehlercode 43 Disney Plus bedeutet, dass das Video, das Sie sehen möchten, möglicherweise nicht in der Inhaltsliste enthalten ist oder dass es Probleme mit der Verbindung gibt. Sobald die Sendevereinbarung beendet oder der Vertrag abgeschlossen ist, entfernt der Disney Plus-Server automatisch jeden Show-Thread. Der Fehlercode 43 kann erscheinen, wenn die App oder das Gerät, das Sie verwenden, nicht aktuell ist.
Das Problem kann auf allen Geräten auftreten, die Sie unterstützen, wenn die Disney Plus-App nicht auf den neuesten Stand gebracht wurde.
Sie können Ihre alte Disney Plus-App löschen. Dann können Sie die neue Disney Plus-Version installieren.
Sie sollten niemals wegen eines Fehlers von Disney Plus aufhören zu schauen. Der Live-Stream wird nicht durch Stromausfälle oder langsame Internetgeschwindigkeiten unterbrochen. Es treten jedoch Fehler auf. Die gute Nachricht ist, dass Sie einige Fehler möglicherweise selbst beheben können. In den übrigen Fällen kann Disney Plus Ihnen bei der Fehlerbehebung helfen oder Vorschläge unterbreiten.
Die WebsiteDisney-Plus-Download ist eine gute Möglichkeit, Disney+ fehlerfrei anzusehen.
https://netflixdownloader.jp/best-british-shows-on-netflix

Netflixで英国の優れたショーを探しているなら、いくつかの素晴らしいオプションがあります。これらには、Danger Mouse、Downton Abbey、およびTraitorsが含まれます。また、Call the Midwife and the Crownなどのクラシックショーをチェックすることもできます。皆に合うものがあり、英国の最高のショーはインターネットで自由に見ることができます。
Netflixの新しいDanger Mouse Cartoonシリーズは、家族や友人を集めて大笑いするための楽しい方法です。このショーがファンのお気に入りである理由は簡単にわかります。その漫画スタイルと機知に富んだウィットは、他のゲームから幼い子供たちを誘惑するかもしれません。キャラクターを声に出したエルドンは、アニメーションが元のシリーズから長い道のりを歩んできたと言います。ショーのクリエイターは、オリジナルの接着剤とストリングの不安定さをシミュレートしようとはしませんでしたが、代わりに同じ結果を達成するために大きなコンピューターを使用しました。特に、彼らは「iPatch」と呼ばれるテクノロジーを使用しました。これにより、より現実的な効果が可能になります。
ショーには、さまざまな悪役と善良な人がいます。 Danger Mouseは、Baren Greenback、Stiletto Mafia(Dave LambとEd Gaughanの声)、ねじれた小さな女の子、さらにはアヒルの吸血鬼でさえ戦わなければなりません。それは舌のようなジンゴイズムでいっぱいで、有名なビクトリア朝のエンジニアのエクスプロイトをパロディしています。ショーはまた、猿の発明家を悪役として紹介し、4番目の壁を壊し、ユニークで面白い漫画になります。
NetflixのDanger Mouse Cartoonシリーズは、オリジナルの漫画シリーズに基づいており、ストリーミングとダウンロードが可能です。このシリーズは、名誉あるマウスと彼の友人の冒険に続きます。キャラクターには、男爵グリーンバックと彼のバグパイププレイの召使、ペンフォールドが含まれます。このシリーズは、首相をグリーンバックから救おうとする際に、名誉あるヒーローの冒険に続きます。このシリーズは、地球の紡績を止めるというバロン・グリーンバックの悪魔的な計画にも続きます。
NetflixとBBC iPlayerのCall The Midwifeの新しいエピソードをキャッチできます。医療ドラマは、ユーモアとキャラクター間の強い絆を楽しむ視聴者にヒットします。また、中絶、先天異常、貧困、売春、同性愛などの現在の問題を扱っています。
もともとBBCで放送されていたこのシリーズは、1950年代後半にロンドンの東端にある助産師グループの物語を語っています。シリーズはすでにシーズン12と13で更新されており、シーズン11はクリスマススペシャルで初演されます。このシリーズでは、1967年のイースターエピソードも登場します。イースターの前夜に開催され、イースターボンネットパレードや歌手姉妹のモニカジョーンによるパフォーマンスなどのイベントが含まれています。
PBSにはCall the Midwifeのストリーミング権が拡張されていませんが、Netflixは現在8シーズンすべてを持っています。これは、米国で放映されてから数か月後にストリーミングプラットフォームで最新のエピソードを視聴できることを意味します。 Netflixは、シーズン10がいつリリースされるかをまだ発表していませんが、待っている間に8つの前シーズンに追いつくことができます。
Netflixで助産師に電話するのを見るには、ストリーミングサービスのサブスクリプションが必要です。残念ながら、テレビ番組はすべての地域で利用できません。この問題を克服するために、VPNを使用して、IPアドレスを変更し、Netflixを欺き、別の地域にあると思わせることができます。
Downton Abbeyは、イギリスの貴族が長く衰退し始めると、エドワード時代の時代に人生を経験するとき、クローリー家に続く時代のドラマです。このシリーズは、タイタニック、第一次世界大戦、アイルランド独立戦争、ビールホールプツシュなど、時代の現実の出来事で織り込まれています。
Uber Popularシリーズはすでに映画に適応されています。シーズン2は4300万人によってストリーミングされ、シーズン3はすぐにストリーミングサービスにヒットすると予想されます。これは、2つの世界大戦の間にバーミンガムに設定されており、シェルビー犯罪ファミリーに続き、チリアンマーフィーが演じるトミーシェルビーが率いています。
もっとセクシーなものについては、ケイト・ウィンスレットとビル・スカーズガード主演の王冠を見てください。この時代のドラマの女性の視線は画期的です。これは家族全員のショーではありません - それは非常に明確になります。しかし、その豊かで豪華な環境では価値があります。
あなたが米国にいて、Netflixで何か新しいものを見たいなら、あなたは裏切り者を見たいかもしれません。このショーは、CIAおよびFBIエージェントのグループに続いて、裏切り者のグループを追跡します。プロットはかなり予測可能ですが、いくつかの驚きがあります。男の頭の上に一杯の水が注がれるシーンは、あなたが注意すべきシーンです。
ショーのプロットは複雑ですが、ジョン・ル・カールの小説ほど複雑ではありません。冷戦時代の設定により、ソビエトブロックの台頭と米国とイスラエルの間の進行中の緊張に焦点を当てたショーがよりアクセスしやすくなります。ただし、シリーズには欠陥がないわけではありません。スパイ映画が好きなら、裏切り者は素晴らしい選択になります。
シリーズのもう1つの顕著な側面は、それが真のイベントに基づいているという事実です。第二次世界大英国の間に設定されており、1945年の選挙に集中しています。当時、労働党は議会を支配していたので、彼らは戦争を避けたいと思っていました。しかし、イギリス人は第二次世界大戦の余波でそれほど無実ではありませんでした。
Traitorsは、2019年にチャンネル4とNetflixで最初に初演された英国のテレビドラマのミニシリーズです。第二次世界大戦の終了後に行われ、陰謀を明らかにしようとする人々のグループに従っています。シリーズはクリフハンガーで終わりましたが、ショーランナーのボー・ウィリモンは以前、シーズン2があるとは思っていなかったと言いました。しかし、彼は、それが創造的に理にかなっているなら、彼はそのアイデアにオープンであると言いました。
犯罪ギャングピーキーブラインドは、戦争のヒーローであるトーマスシェルビーと彼の家族が戻ってきたことによって運営されています。銃の木箱が行方不明になると、彼らは世界で自分の地位を前進させる絶好の機会であることに気付きます。しかし、彼らはまた、合法的なビジネスがはるかに優れていることを認識しています。その過程で、彼らは生き残るために他の犯罪グループと戦います。
Peaky Blindersの新しいシーズンは、2022年10月にNetflix UKで初演される予定です。当初、2022年2月にBBCで放映され、後に英国外のNetflixでリリースされました。シーズンには6つのエピソードが含まれ、トミーシェルビーの人生の物語を続けます。この時代のドラマのこの第6シーズンは、キャラクターが北米の新しい機会を探求するのを見るでしょう。ショーは、チリアン・マーフィー、ポール・アンダーソン、ソフィー・ランドルを主演しています。
NetflixのPeaky Blindersは、第二次世界大戦後のイングランドでのギャングの生活に焦点を当てています。ショーには、象徴的なシーン、ニックケーブのテーマソング、スタイリッシュなファッションがいっぱいです。 Cillian Murphyは、Tommy Shelbyとしてキャリア最高のパフォーマンスを提供します。
NetflixのPeaky Blindersはどこでも利用できませんが、米国に住んでいる場合は、それを見るのに問題はないはずです。ショーは、批評家と視聴者の両方から高い賞賛を受けています。
NetflixのITクラウドは、ストリーミングプラットフォームで最も話題になっている新しいショーの1つです。コメディシリーズは、架空の会社レイントルムインダストリーズで働いている3人のITプロフェッショナルを中心に展開しています。それらの2つは天才であり、もう1つはマネージャーです。ショーには、コメディ、リアルライフの状況、IT関連の実用的なジョークがいっぱいです。
ショーは、これらのITヘルプデスク技術者の生活に続き、大規模な会社の地下にあります。 IT群衆は、会社のIT部門で働くオタクのグループです。彼らは長時間働き、サイエンスフィクションの映画を見て、週末をコンピューターの上に叩きます。彼らはまた、女性に鋭い目をし、ベルトにエアロゾルの水の缶を持っています。チームとして、彼らはファイアウォールやサイエンスフィクションへの執着によって統一されています。 IT群衆は、IT会社で働いているキャリア志向のパンクであるミドルマネージャーのジェンで構成されています。
IT群衆は面白い英国のコメディです。 Netflixでのほとんどのショーとは異なり、IT Crowdは英国のアクセントを持つコメディです。キャストには、Game of ThronesでRobb Starkを演じたRichard Maddenが含まれます。また、ジェレミー・ピベンは若い社会的に厄介なティーンエイジャーとして、ジリアン・アンダーソンは厄介なセックスセラピストとして主演しています。 Netflixによると、シリーズは発売時に4,000万人の視聴者を受け取りました。ショーの第3シーズンは、9月17日に初演される予定です。